Powered by Squarespace
Contact

contact:

This form does not yet contain any fields.


    Entries in Lomography (28)

    Sunday
    Jul262009

    Fremont Bridge


    Fremont Bridge


    Originally uploaded by kaiy


    Early evening at the Adobe building in Fremont.

    Vivitar Ultra Wide and Slim, on Fuji Pro 400 H.

    Saturday
    Jul112009

    Diana+ vs. Holga or Which camera should I buy?

    There is a comprehensive comparison on the blog posted here:

    http://www.dianacamera.com/blog/2007/12/18/holga-camera-vs-diana-camera.html

    The Diana+ is a more flexible camera, having more controls (3 f-stops + Pinhole aperture vs 1 aperture). The Diana+ also has the albility to change lenses. Currently, Lomography offers 4 additional lens.

    The Holga, on the other hand, is a very solidly built camera, and while not being as flexible, is still a very capable camera. It will take photos that equal that of the Diana.

    Which should you get? I usually like to recommend the Holga 120N or 120FN for beginners.

    Why? It's a cheaper and simpler camera to learn with. If you get this camera it keeps the cost of exploring toy camera photography on the cheap side. If it turns out that toy camera photography is your passion, then you can explore getting the Diana+.

    Let's look at the cost:
    Holga 120N - $28 (no flash, but with a hotshoe)
    Holga 120FN - $35 (built-in flash)

    Diana+ - $50 (no flash, no hotshoe)
    DianaF+ - $100 (comes with electronic flash attachment and hotshoe accessory)
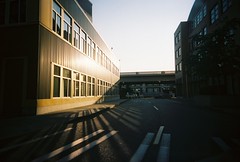
    Sample Photos:
    Holga
    http://www.flickr.com/groups/86881528@N00/

    Diana+ DIanaF+
    http://www.flickr.com/groups/diana_plus/

    One of the main things you are going to have to figure out, is whether or not you have the patience and temperment to work with a film camera. Working with film, there is no instant feedback from a LCD screen, and you won't be able to delete your mistakes and forget about them.

    On top of that, 120 film is a little more difficult to deal with than 35mm film, since there are fewer labs that can process it. Ask around at your local Walmart, Costco or other 1-hour labs. While they may not be able to process the film on site, many of these labs will send the film out to be processed for you.

    The next option is to find a local pro-lab. These are labs that specifically cater to professional photographers and will be able to process your film on site. As you might imagine, it can be a little pricey.

    Another film processing option is to send out the film to be processed. Check out these processors, they both offer processing by mail:
    http://www.dwaynesphoto.com/
    http://www.swanphotolabs.com/swan08/index.php

    Then the best of all option, process the film yourself. BW film processing and even color processing are not too difficult to learn and also not very expensive to get into.

    If you think that 120 film is too much trouble, you can try a 35mm camera, like the Holga 135BC or the Superheadz Black Slim Devil or White Slim Angel.

    The Holga 120N or 120CFN (120 format) or the 35mm Holga 135BC, or Superheadz Slim cameras can be found at Freestyle Photo supply:
    http://freestylephoto.biz/

    The Diana+ cameras can be found at some stores like Urban Outfitters, or online at http://lomography.com

    Whichever camera you choose, remember that the point of lo-fi photography is to have fun and don't sweat the details!

    Friday
    Jul032009

    Video: Out of the Box- Diana+ Fisheye Lens


    We take a look at the Lomography Diana+ and Diana F+ Fisheye Lens.

    Sunday
    Jun072009

    Vivitar Ultra Wide & Slim Low Cost Lomography


    These are photos from the first roll of film run through our Vivitar Ultra Wide & Slim. The camera has a very nice look to the images, exhibiting a good vignette, and nice plastic camera characteristics that one would expect from a good toy camera. It uses the cheaper and easier to get processed 35mm film. If you are looking for a inexpensive introduction into the world of plastic cameras, consider this one.

    This roll of film was also used to test the film to digital CD option at the local drugstore. Many 1-hour labs offer this service for only a few additional dollars. By skipping the prints and only getting the film processed and transferred to CD, it will cut the processing charges down. It was very simple to load the CD and upload the images to the website.

    More photos from this camera can be seen on Flickr:
    http://www.flickr.com/photos/kaiy/sets/72157619288479623/


    While Vivitar is no longer making these, you can find the Black Slim Devil, a Superheadz clone at the Four Corners Store for $30US. If you are patient, you can do what we did, and keep an eye on your local thrift store and pick one up for a few dollars.

    There's also a nice little fish-eye lens accessory available for this camera, also at the Four Corners Store.
    Monday
    Mar022009

    Unloading your 35mm Holga 135 camera.

    I made a quick clip on unloading the Holga 135, but I seem to have misplaced it. Here are the 7 simple steps it takes to unload your Holga 135. These directions will also apply to any simple 35mm film camera, like the Lomo Fisheye, or other plastic 35mm cameras.

    Step 1.
    Press the rewind button on the bottom of the camera, this releases the winding mechanism.

    Step 2.
    Flip open the crank on the rewind knob.

    Step 3.
    Rotate the crank in a clockwise motion, with the camera lens pointing away from you.

    Step 4.
    Keep winding until you hear and feel the lead end of the film snap into the cassette. The tension on the knob will reduce quite a bit.

    Step 5.
    Pull up on the rewind knob to open the camera back

    Step 6.
    Remove the 35mm film cassette.

    Step 7.
    Take the film in to your film processor.

    I am planning to reshoot this video, but you'll be able to rewind the film with these instructions.