Powered by Squarespace
Contact

contact:

This form does not yet contain any fields.


    Tuesday
    Sep132011

    Photo Swap and Show

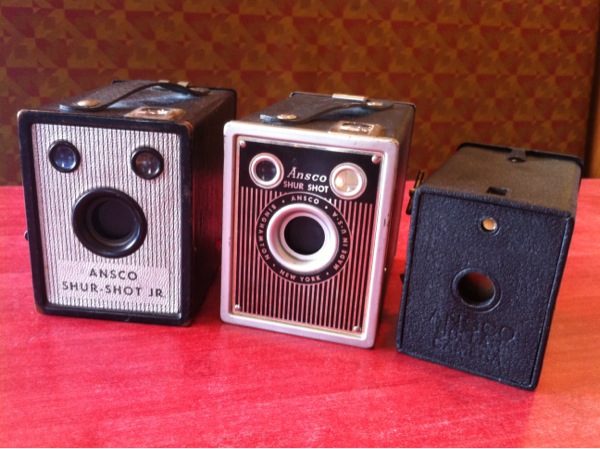
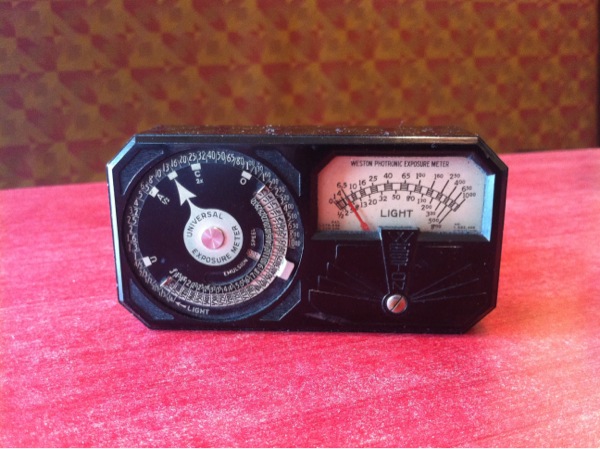
    I went to the 32nd Annual Camera and Photographica Swap in Kent today. There were lots of fun and interesting items on display and sale there. I came away with 3 box cameras, and old light meter and some filters.

    The box cameras are:
    Ansco Dollar Camera - 127 film
    Ansco Shur Shot - 120 film
    Ansco Shur Shot Jr. - 120 film

    I didn't intend to purchase so many box cameras, but the prices were more than reasonable ($7 for the Dollar camera, and a $1 each for the other 2 cameras). All appear to be good working order.

    The old Weston light meter doesn't work, but I got it more for it's cool looks than for something I intended to use.

    Monday
    Aug152011

    What you see is not what you get! - Viewfinder Parallax Error

    I was asked:

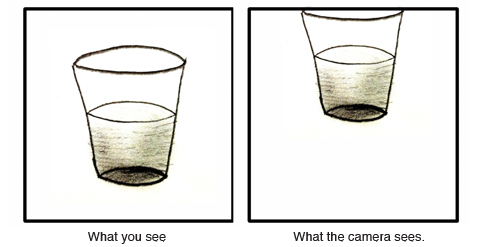
    I've got a diana f+ and i took pictures with the lomography film 400 ISO 120mm and lomography film 100 ISO 120mm. Some of the pictures I took was cropped. I thought my results will be exactly like the one my eyes saw through the hole when you take a picture of something. But it turned out to be in a different angle. For example, I took a picture of a glass of drink and when i printed it, it turned out only half of the glass. Is there a way to fix that?

    My Answer:
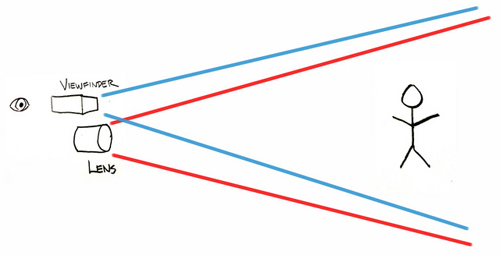
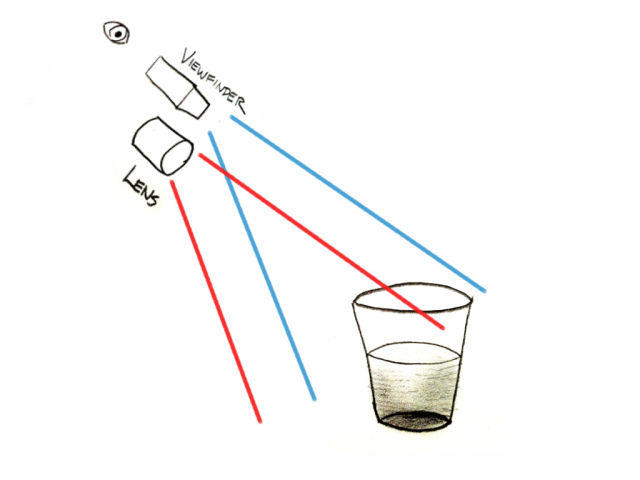
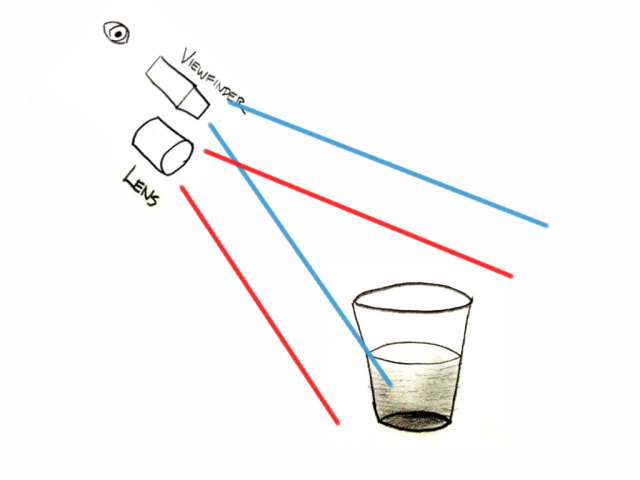
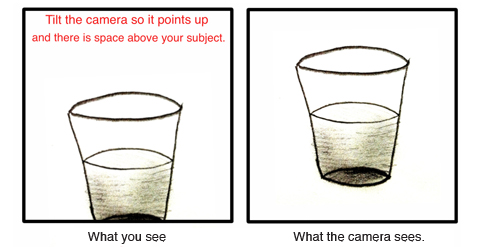
    What you are experiencing is viewfinder parallax error. The viewfinder sits over the lens, and doesn't exactly display what the lens sees. Normally, with most subjects, you don't really see this effect causing a problem. The subject is usually far enough away from the camera that the difference in the higher position of the viewfinder from the lens isn't noticeable. However, the closer you get to the subject, the more pronounced the effect. So when you are trying to shoot a glass on a table, that is only a few feet away, you need to compensate for the viewfinder offset by slightly tilting the camera up.


    Parallax in a normal scene is not a problem.

    But when the subject is close to the camera, then parallax error can be a big problem.


    In order to compensate for Parallax error, you have to adjust how you frame the photo in the viewfinder.

    If you are shooting with a Holga 120 or 135, you will also have to compensate for the fact that the viewfinder sits to the left of the lens. This means that to compensate, you will have to slightly tilt the camera to the left if you are shooting a subject that is very close to the camera.

    Sunday
    Jun122011

    Polaroid Land Camera - Battery Conversion Mod

    This is one of the most requested videos I have on my to do list. I'm still working on the video, but here is the Words and Pictures version of it.

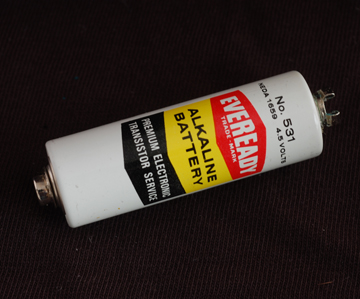
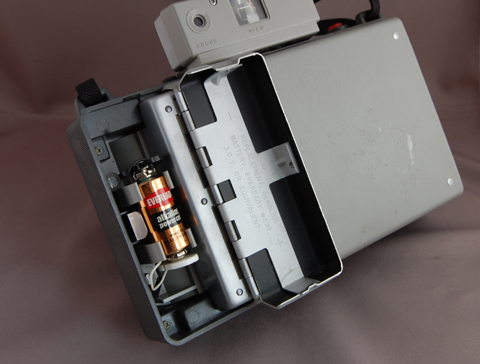
    The metal body folding Polaroid Land cameras use an odd battery that has snaps on either end.

    These Polaroid cameras use either a 3v #532 battery, or a 4.5 volt #531 battery.
    To identify which battery your camera uses, open the battery compartment and read the engraved type on the back of the compartment door.
    If you are shopping for a Polaroid Pack camera, I would recommend looking for a 3 volt camera, as it is easier to convert.
    The chart below identifies which Polaroid Pack camera models use what type of battery:
    3 volt cameras, #532 battery
    103, 104, 125, 135, 210, 215, 315, 320, 330, 420, 430, 440, M60, and Countdown 70
    The following cameras use two 3 volt, #532 batteries, one of which is used for the built-in electronic development timer. 
    If converting one of these cameras, you need only replace the camera shutter battery.
    335, 350, 360, 450, M80, and Countdown 90
    4.5 volt cameras, #531 battery:
    100, 101, 102, 220, 225, 230, 240, 250, and 340
    3-Volt Mods

    3 Volt Mod - Version 1:
    This is the quick and dirty mod for 3v cameras can be done using a 3v lithium battery.
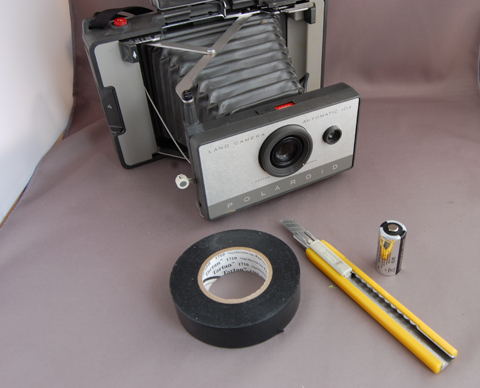
    Tools and Parts needed:
    • Utility knife
    • Electrician's Tape
    • CR 123 3v battery (or equivalent)

    Step 1:
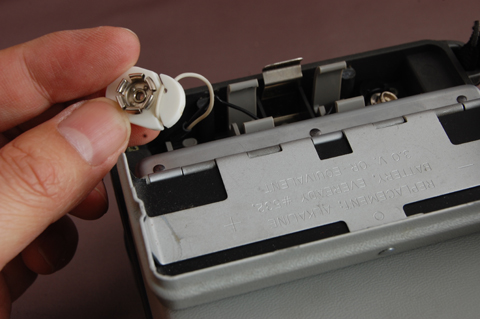
    The unwind the wires that are looped around the plastic end of the snaps.

    Step 2:
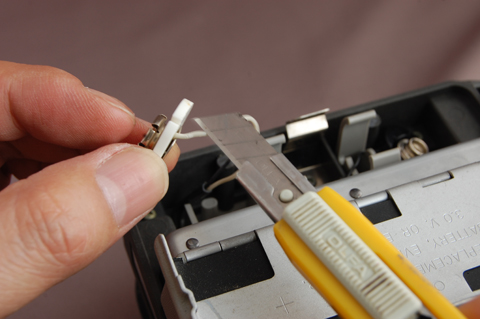
    Cut the wires close to the snap.

    Step 3:
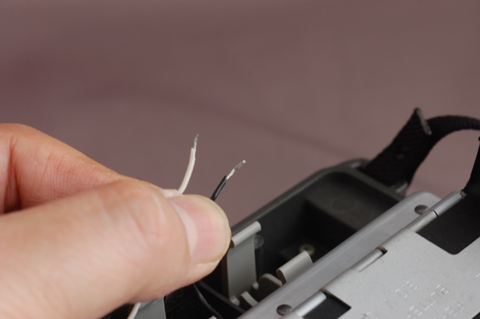
    Strip about 1/4" (3-4mm) of insulation from the ends of the wires.

    Step 4:
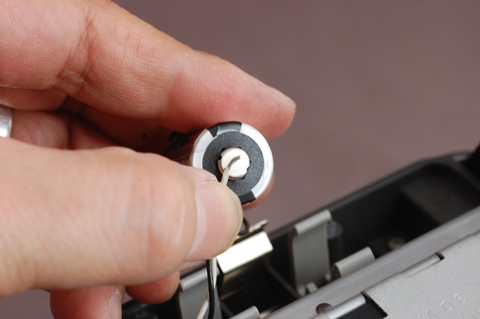
    Tape the white wire to the positive end of the battery.

    Step 5:
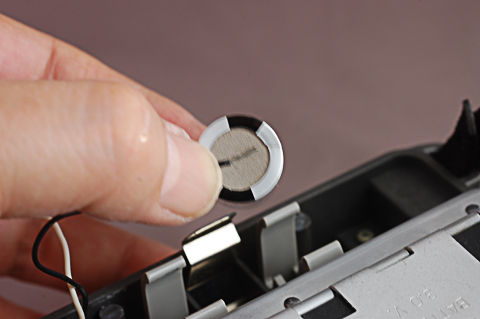
    Tape the black wire to the negative end of the battery.

    Step 6:
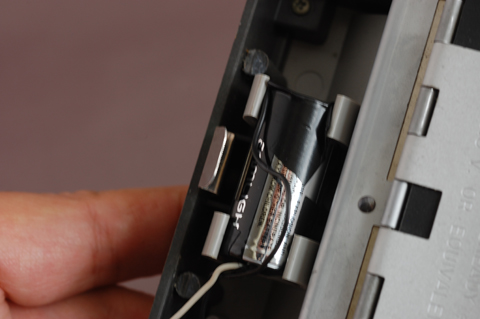
    Insert the taped battery in the battery clip.


    Check the shutter to make sure you have a positive connection to the battery.

    3 Volt Mod - Version 2:
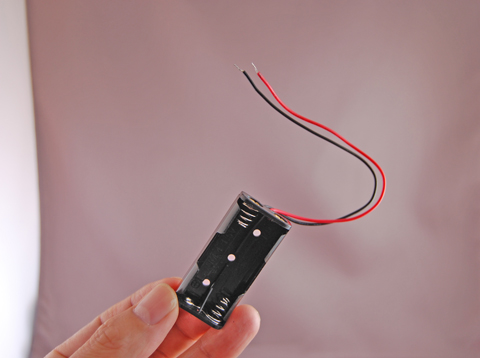

    This is the more elegant version of the 3 volt mod. It uses a 2 AAA cell battery holder. I got mine from Radioshack, but any equivalent will do. The uncovered version is better, as the enclosed battery pack is slightly too large for the battery compartment.

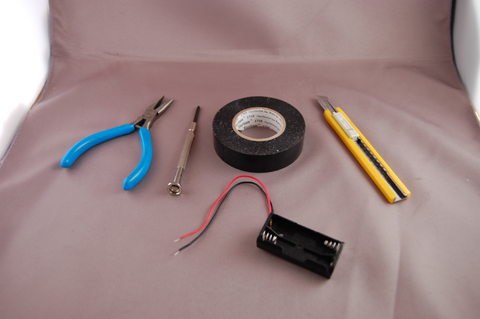
    Tools and Parts needed:

    • Utility knife
    • Electrician's Tape
    • 2-cell AAA battery holder (Radioshack part #270-398B or equivalent)
    • phillips screwdriver (if you need to remove a screw-mounted battery holder)
    • needle nose pliers (if you need to remove a built in battery holder)

    Follow Steps 1-3 above.

    Step 4b:
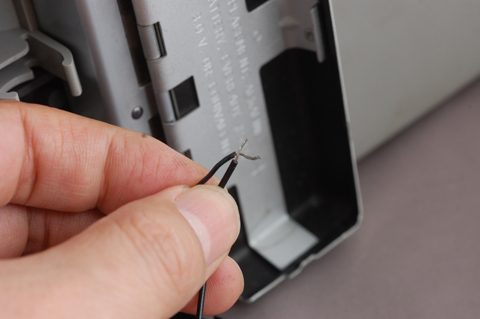
    Take the black wire of the battery pack, and match it up with the black wire of the camera.

    Step 5b:
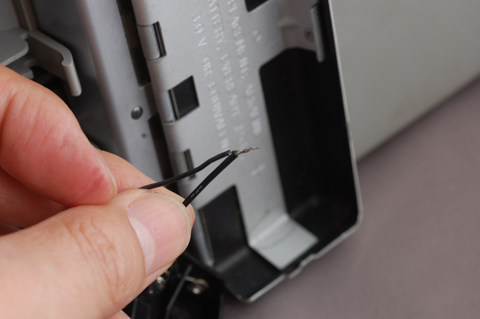
    Twist the wires together. Wrap the two wires together with a  1.5" length of electrical tape.

    Repeat these steps with the red and white wires.

    Optional: If you are handy with a soldering iron, solder the wires together for the best connection.

    Step 6b:
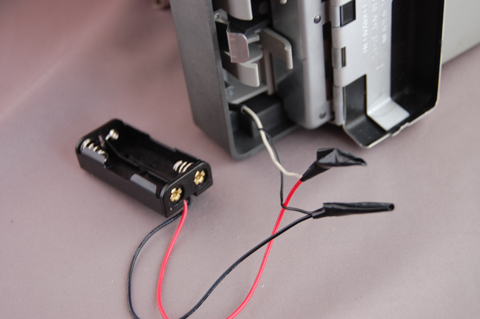

    Step 7b:

    You need to make room for the battery holder. If the battery clip screwed in, remove it with a small phillips screwdriver. If the battery clip is molded into the same plastic as the camera, you will have to remove it by nibbling at it with a pair of small needle nose pliers. 

    Note: A photograph will be added later, after I shoot the clip removal for the how-to video.


    4.5 Volt Mod - Version 1:
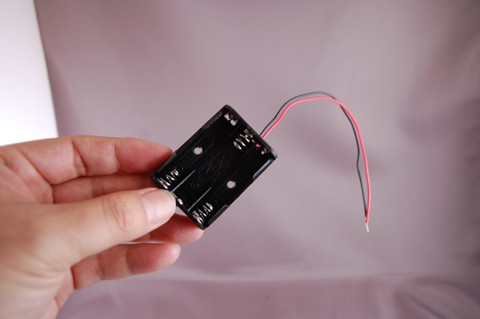
    This is the same as the 3 volt mod, version 2, except at the end. The 3 cell battery holder won't fit inside the battery compartment, se we need to make a notch in the battery compartment for the wires to come out. 

    Tools and Parts needed:
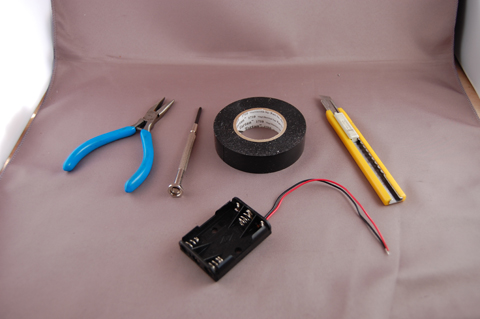

    • Utility knife
    • Electrician's Tape
    • 3-cell AAA battery holder (Radioshack part #270-42 or equivalent)
    • glue or velcro to attach the battery holder to the camera

    Follow Steps 1-3 from the 3 volt, Version 1

    Follow Steps 4b-6b from the 3 volt, Version 2, except you are connecting a 3 cell, 4.5 volt battery holder instead of the 2 cell holder.

    Step 7c:
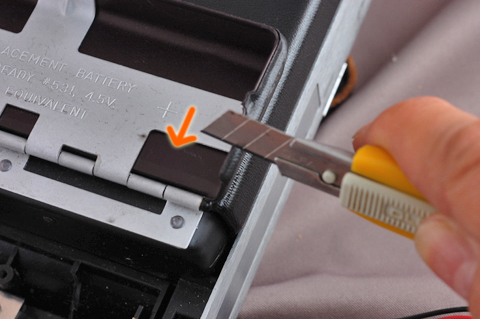


    With the utility knife, start to scrape a notch to the left of the bump in the battery compartment door edge. You don't want to put the notch in the bump, as the bump is what holds the battery compartment door closed.

    The battery compartment is metal, but it's aluminum, so it can be cut by using the cutting edge of the utility knife to scrape a notch into the metal. Scrape the metal to remove it, by applying pressure, and dragging the blade perpindicular to the compartment edge (in the direction of the arrow). Once you get a slight divot going, it gets easier to cut down into the metal. Little shavings will come off as you cut into the metal.

    Step 8c:
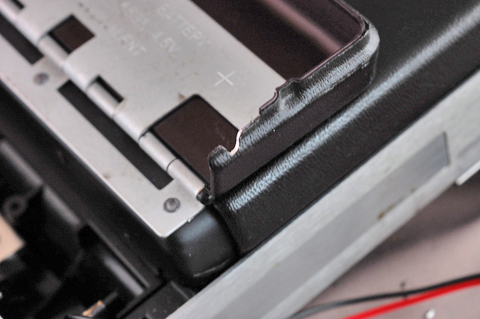


    The finished notch.

    Step 9c:
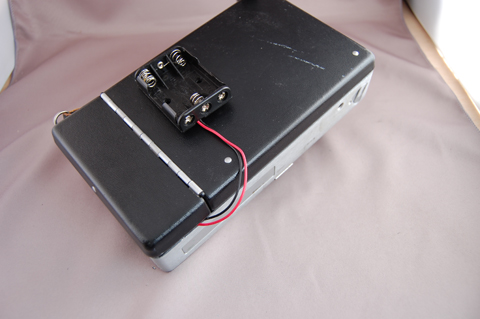
    The battery pack can be attached to the camera with glue or industrial velcro applied to the battery pack and to the camera body.


    To come: 4.5 volt mod, Version 2.

    There is a more elegant solution for the 4.5 volt mod, but it involves modifying a 4-cell holder so that it holds 3 batteries. This is a lot of work, but the advantage is that the battery holder will fit inside the battery compartment.

    I will post this 4-cell battery holder to 3-cell battery holder later, as I need to improve my light set-up, so that you can see what is being done to modify the battery holder. 


    FYI:

    For those of you who are not technically inclined, you can still find batteries (#531 4.5v, #532 3v) at Amazon.com.

    Polaroid Folding Land Camera Batteries:

    Exell A19PX/ 531 4.5v battery

    http://www.amazon.com/Exell-A19PX-V19PX-Alkaline-Battery/dp/B000ANETWC/ref=sr_1_1?s=electronics&ie=UTF8&qid=1344469962&sr=1-1&keywords=battery+531+4.5v


    Exell A24PX/ 532 3v battery

    http://www.amazon.com/Exell-A24PX-V24PX-Alkaline-Battery/dp/B005MCCA9K/ref=sr_1_1?s=electronics&ie=UTF8&qid=1344470095&sr=1-1&keywords=battery+532+3v


    Friday
    Jun032011

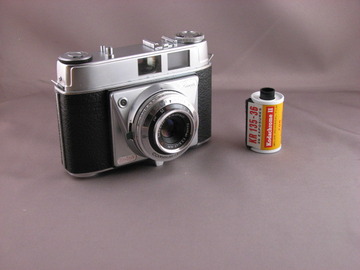
    Thrift Store Find - 35mm Kodak Retinette, Model 30

    This is a Kodak 35mm Retinette, Model 30 that I picked up from a thrift store.  The Retinettes were popular, and Kodak made many variations of this camera. It was built as a less expensive alternative to the Kodak Retina cameras. According to Wikipedia, the Model 30 was first manufactured in 1958.

    The Kodak Retinette, Model 30 specs are:

    45mm , f/3.5 Schneider-Kreuznach Reomar Lens

    Compur Rapid Shutter 

    shutter range - 1/500s - 1s, B setting

    aperture range - f/3.5 - f22

    accessory shoe, M-X flash sync

    self-timer

    tripod mount

    leather case


    The camera is in very good condition, with all shutter speeds working, and the aperture appears to close cleanly. It is a basic camera, with no metering and zone focussing. The roll of film that appears with the camera was loaded in the camera when I found it. It is a roll of Kodachrome II. I sometimes like to get the old rolls processed, but unfortunately, there are no more labs that do Kodachrome processing. I am looking forward to running a roll of film through this camera.

    Cost:$15

    Tuesday
    May242011

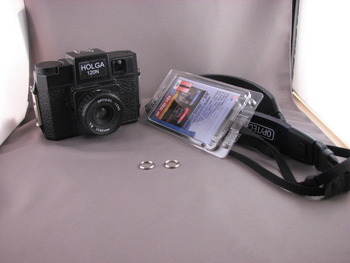
    Quick Tip - Attaching a better camera strap to a Holga 120 camera.

    I'm not crazy about the stock camera strap that comes with the Holga 120 camera. The stock strap is too short, too thin and the little clips on the strap often come undone at inconvenient moments.

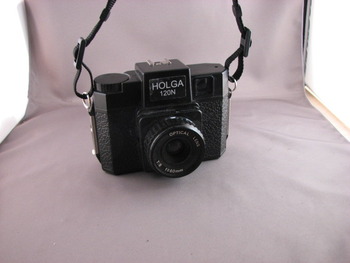
    A better camera strap won't fit on the small lugs on the Holga 120 camera body, but by using 1/2" split rings (these are small key rings), you can attach most any camera strap you like to your Holga 120 camera. I picked up the inexpensive strap from my local camera store, Glazer's here in Seattle. If you can't find a strap conveniently nearby, look online. (Check my Where to Buy page for specific recommendations)

    This modification doesn't work well with the Holga 135 camera, since that camera only has a single attachment lug for a small hand strap.

    I also don't recommend this particular mod for the Diana+,  F+ or Mini cameras. When I tried this on one of my Diana camras, one of the plastic lugs eventually cracked, probably due to stress placed on the lug with the hard metal split rings. A better solution for the Diana cameras might be to use a softer material that won't over stress the plastic lugs on the camera. I think plastic cable ties would work fine for that purpose.

    Procedure:

    This is a very easy mod to do.

    The key ingredients to this Holga mod are two 1/2" split key rings that you can get at most any hardware store or place that makes keys, and a camera strap of your choice that has 3/8"  attachment straps or clips. You may already have an extra camera strap that you can use with this mod.

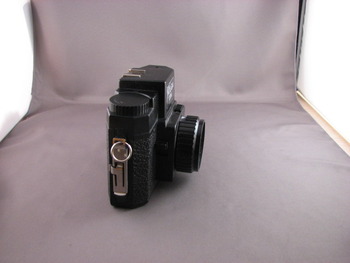
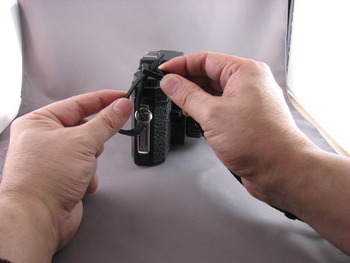
    The split rings are attached to the Holga lugs where the original camera strap attaches.

    With the rings in place, the new camera strap is attached to the split rings.

    You may want to tape the clips to the camera or do the Velcro Mod on your camera, to be sure that the strap won't pull the clips open when bouncing around in your camera bag or purse.