

Polaroid Land Camera - Battery Conversion Mod
This is one of the most requested videos I have on my to do list. I'm still working on the video, but here is the Words and Pictures version of it.
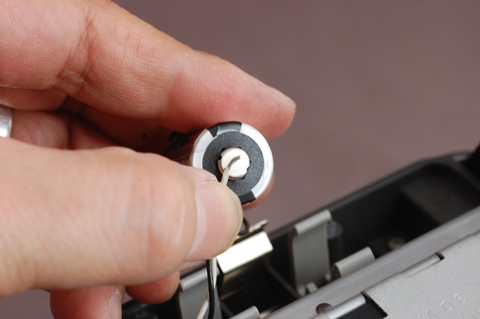
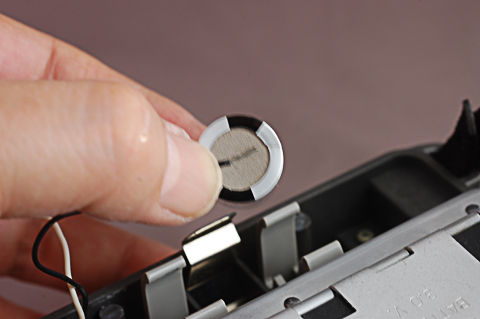
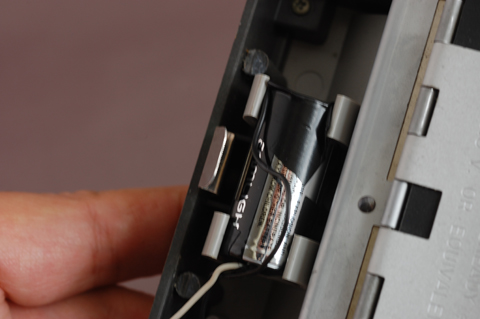
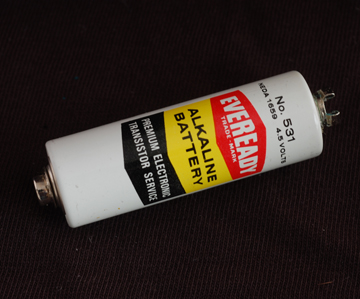 The metal body folding Polaroid Land cameras use an odd battery that has snaps on either end.
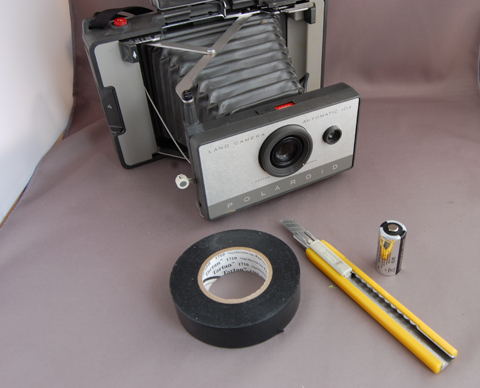
- Utility knife
- Electrician's Tape
- CR 123 3v battery (or equivalent)
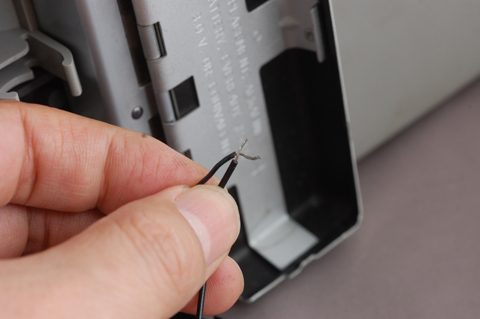
Step 1:

The unwind the wires that are looped around the plastic end of the snaps.
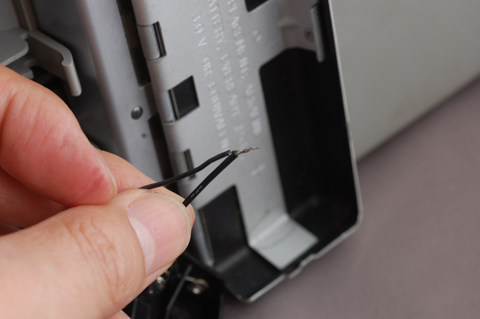
Step 2:
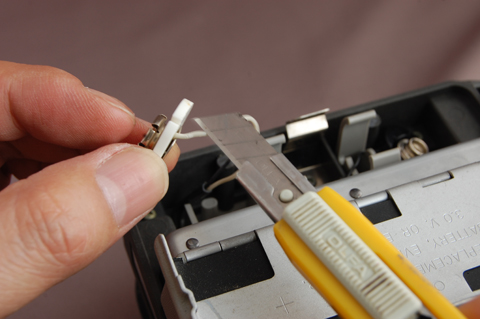
Cut the wires close to the snap.
Step 3:
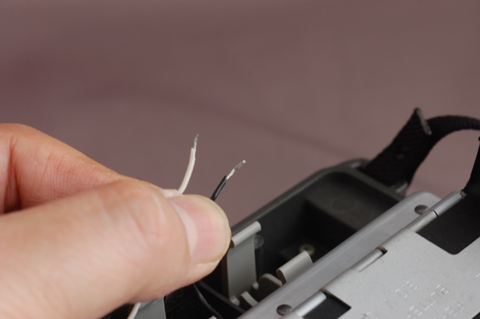
Strip about 1/4" (3-4mm) of insulation from the ends of the wires.
Step 4:
Tape the white wire to the positive end of the battery.
Step 5:
Tape the black wire to the negative end of the battery.
Step 6:
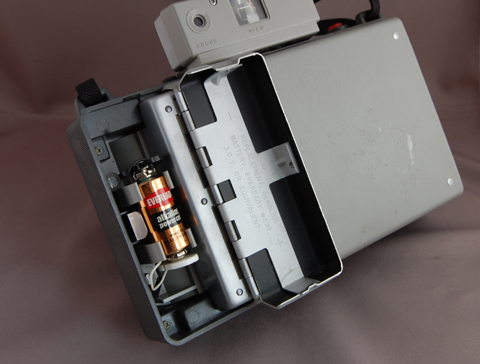
Insert the taped battery in the battery clip.
Check the shutter to make sure you have a positive connection to the battery.
3 Volt Mod - Version 2:

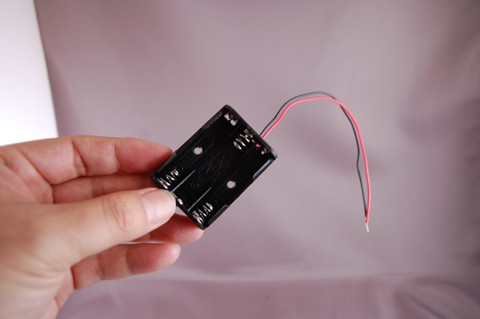
This is the more elegant version of the 3 volt mod. It uses a 2 AAA cell battery holder. I got mine from Radioshack, but any equivalent will do. The uncovered version is better, as the enclosed battery pack is slightly too large for the battery compartment.
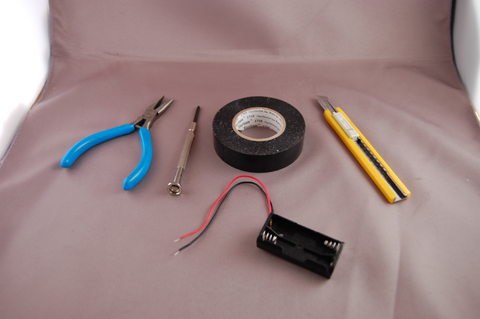
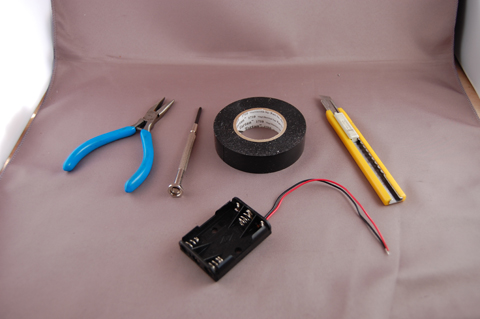
- Utility knife
- Electrician's Tape
- 2-cell AAA battery holder (Radioshack part #270-398B or equivalent)
- phillips screwdriver (if you need to remove a screw-mounted battery holder)
- needle nose pliers (if you need to remove a built in battery holder)
Follow Steps 1-3 above.
Step 4b:
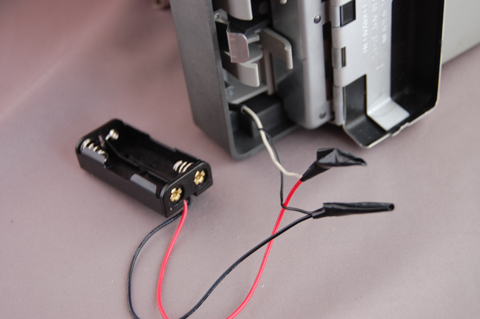
Take the black wire of the battery pack, and match it up with the black wire of the camera.
Step 5b:
Twist the wires together. Wrap the two wires together with a 1.5" length of electrical tape.
Repeat these steps with the red and white wires.
Optional: If you are handy with a soldering iron, solder the wires together for the best connection.
Step 6b:
Step 7b:
You need to make room for the battery holder. If the battery clip screwed in, remove it with a small phillips screwdriver. If the battery clip is molded into the same plastic as the camera, you will have to remove it by nibbling at it with a pair of small needle nose pliers.
Note: A photograph will be added later, after I shoot the clip removal for the how-to video.
4.5 Volt Mod - Version 1:
This is the same as the 3 volt mod, version 2, except at the end. The 3 cell battery holder won't fit inside the battery compartment, se we need to make a notch in the battery compartment for the wires to come out.
Tools and Parts needed:
- Utility knife
- Electrician's Tape
- 3-cell AAA battery holder (Radioshack part #270-42 or equivalent)
- glue or velcro to attach the battery holder to the camera
Follow Steps 1-3 from the 3 volt, Version 1
Follow Steps 4b-6b from the 3 volt, Version 2, except you are connecting a 3 cell, 4.5 volt battery holder instead of the 2 cell holder.
Step 7c:
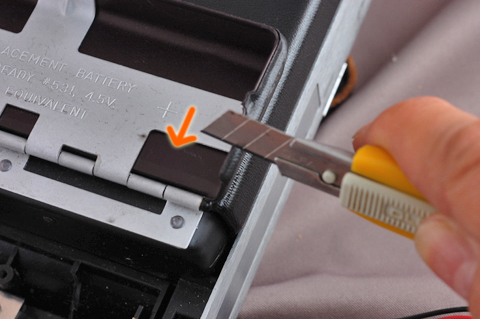
With the utility knife, start to scrape a notch to the left of the bump in the battery compartment door edge. You don't want to put the notch in the bump, as the bump is what holds the battery compartment door closed.
The battery compartment is metal, but it's aluminum, so it can be cut by using the cutting edge of the utility knife to scrape a notch into the metal. Scrape the metal to remove it, by applying pressure, and dragging the blade perpindicular to the compartment edge (in the direction of the arrow). Once you get a slight divot going, it gets easier to cut down into the metal. Little shavings will come off as you cut into the metal.
Step 8c:
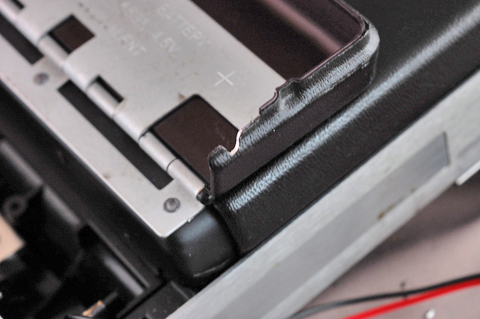
The finished notch.
Step 9c:

The battery pack can be attached to the camera with glue or industrial velcro applied to the battery pack and to the camera body.
To come: 4.5 volt mod, Version 2.
There is a more elegant solution for the 4.5 volt mod, but it involves modifying a 4-cell holder so that it holds 3 batteries. This is a lot of work, but the advantage is that the battery holder will fit inside the battery compartment.
I will post this 4-cell battery holder to 3-cell battery holder later, as I need to improve my light set-up, so that you can see what is being done to modify the battery holder.
FYI:
For those of you who are not technically inclined, you can still find batteries (#531 4.5v, #532 3v) at Amazon.com.
Polaroid Folding Land Camera Batteries:
Exell A19PX/ 531 4.5v battery
Exell A24PX/ 532 3v battery
 Camera Mod
Reader Comments (20)
wow, thanks a lot, it really saved me a lot of time and money
great. I used the dirty road. worked just fine!
You can save some time by just placing 4 dimes in with the CR 123 battery. It will help elongate the battery to fill the original battery holder. It also only cost 40 cents. Mine has been working fine for years.
Thanks for posting this. I rewired my 420 and it's working beautifully!
Thanks so much! I turned my 250 from a pretty ornament to a working camera with your help.
Even though your camera might not be brand specific, you still need to know how easy it will be to get replacement camera batteries. You might have to go to specific electronic stores if the camera battery size is rare, or unusual.
i have a 100 and 2 250s that i tried modding. the black wires all just fell out i guess from them being so old. is there anyway to fix them? i dont even know where the black wire was originally connected to even solder them back on. they all have metal bodys and a folding optical piece. i also have a 220 and a 420 wich both are full plastic that i successfully modded so i do know what im doing but the metal bodys have different wiring. thanks
Thank for the tutorial. Keep up the good work.
The cheap Chinese 6 LED flashlights use 3 AA batteries in a cylindrical holder. The approximate dimensions of the holder are 21.5 mm x 51.5 mm. The holder should fit in the battery compartment. I plan to modify a Model 220 to use one of the holders.
Hello!
Your site is very insteristing, thank you!
But I have a question about my Countdown 90. I have two batteries but you have only one (as you show in Version 1). Do i have tu put 2 batteries also? It's look harder.
Thanks
Roman
Hi Roman. From what I understand, one battery operates the shutter, while the other is used for the electronic timer. You can replace the shutter battery and skip the timer battery, you just have to figure out which runs which system.
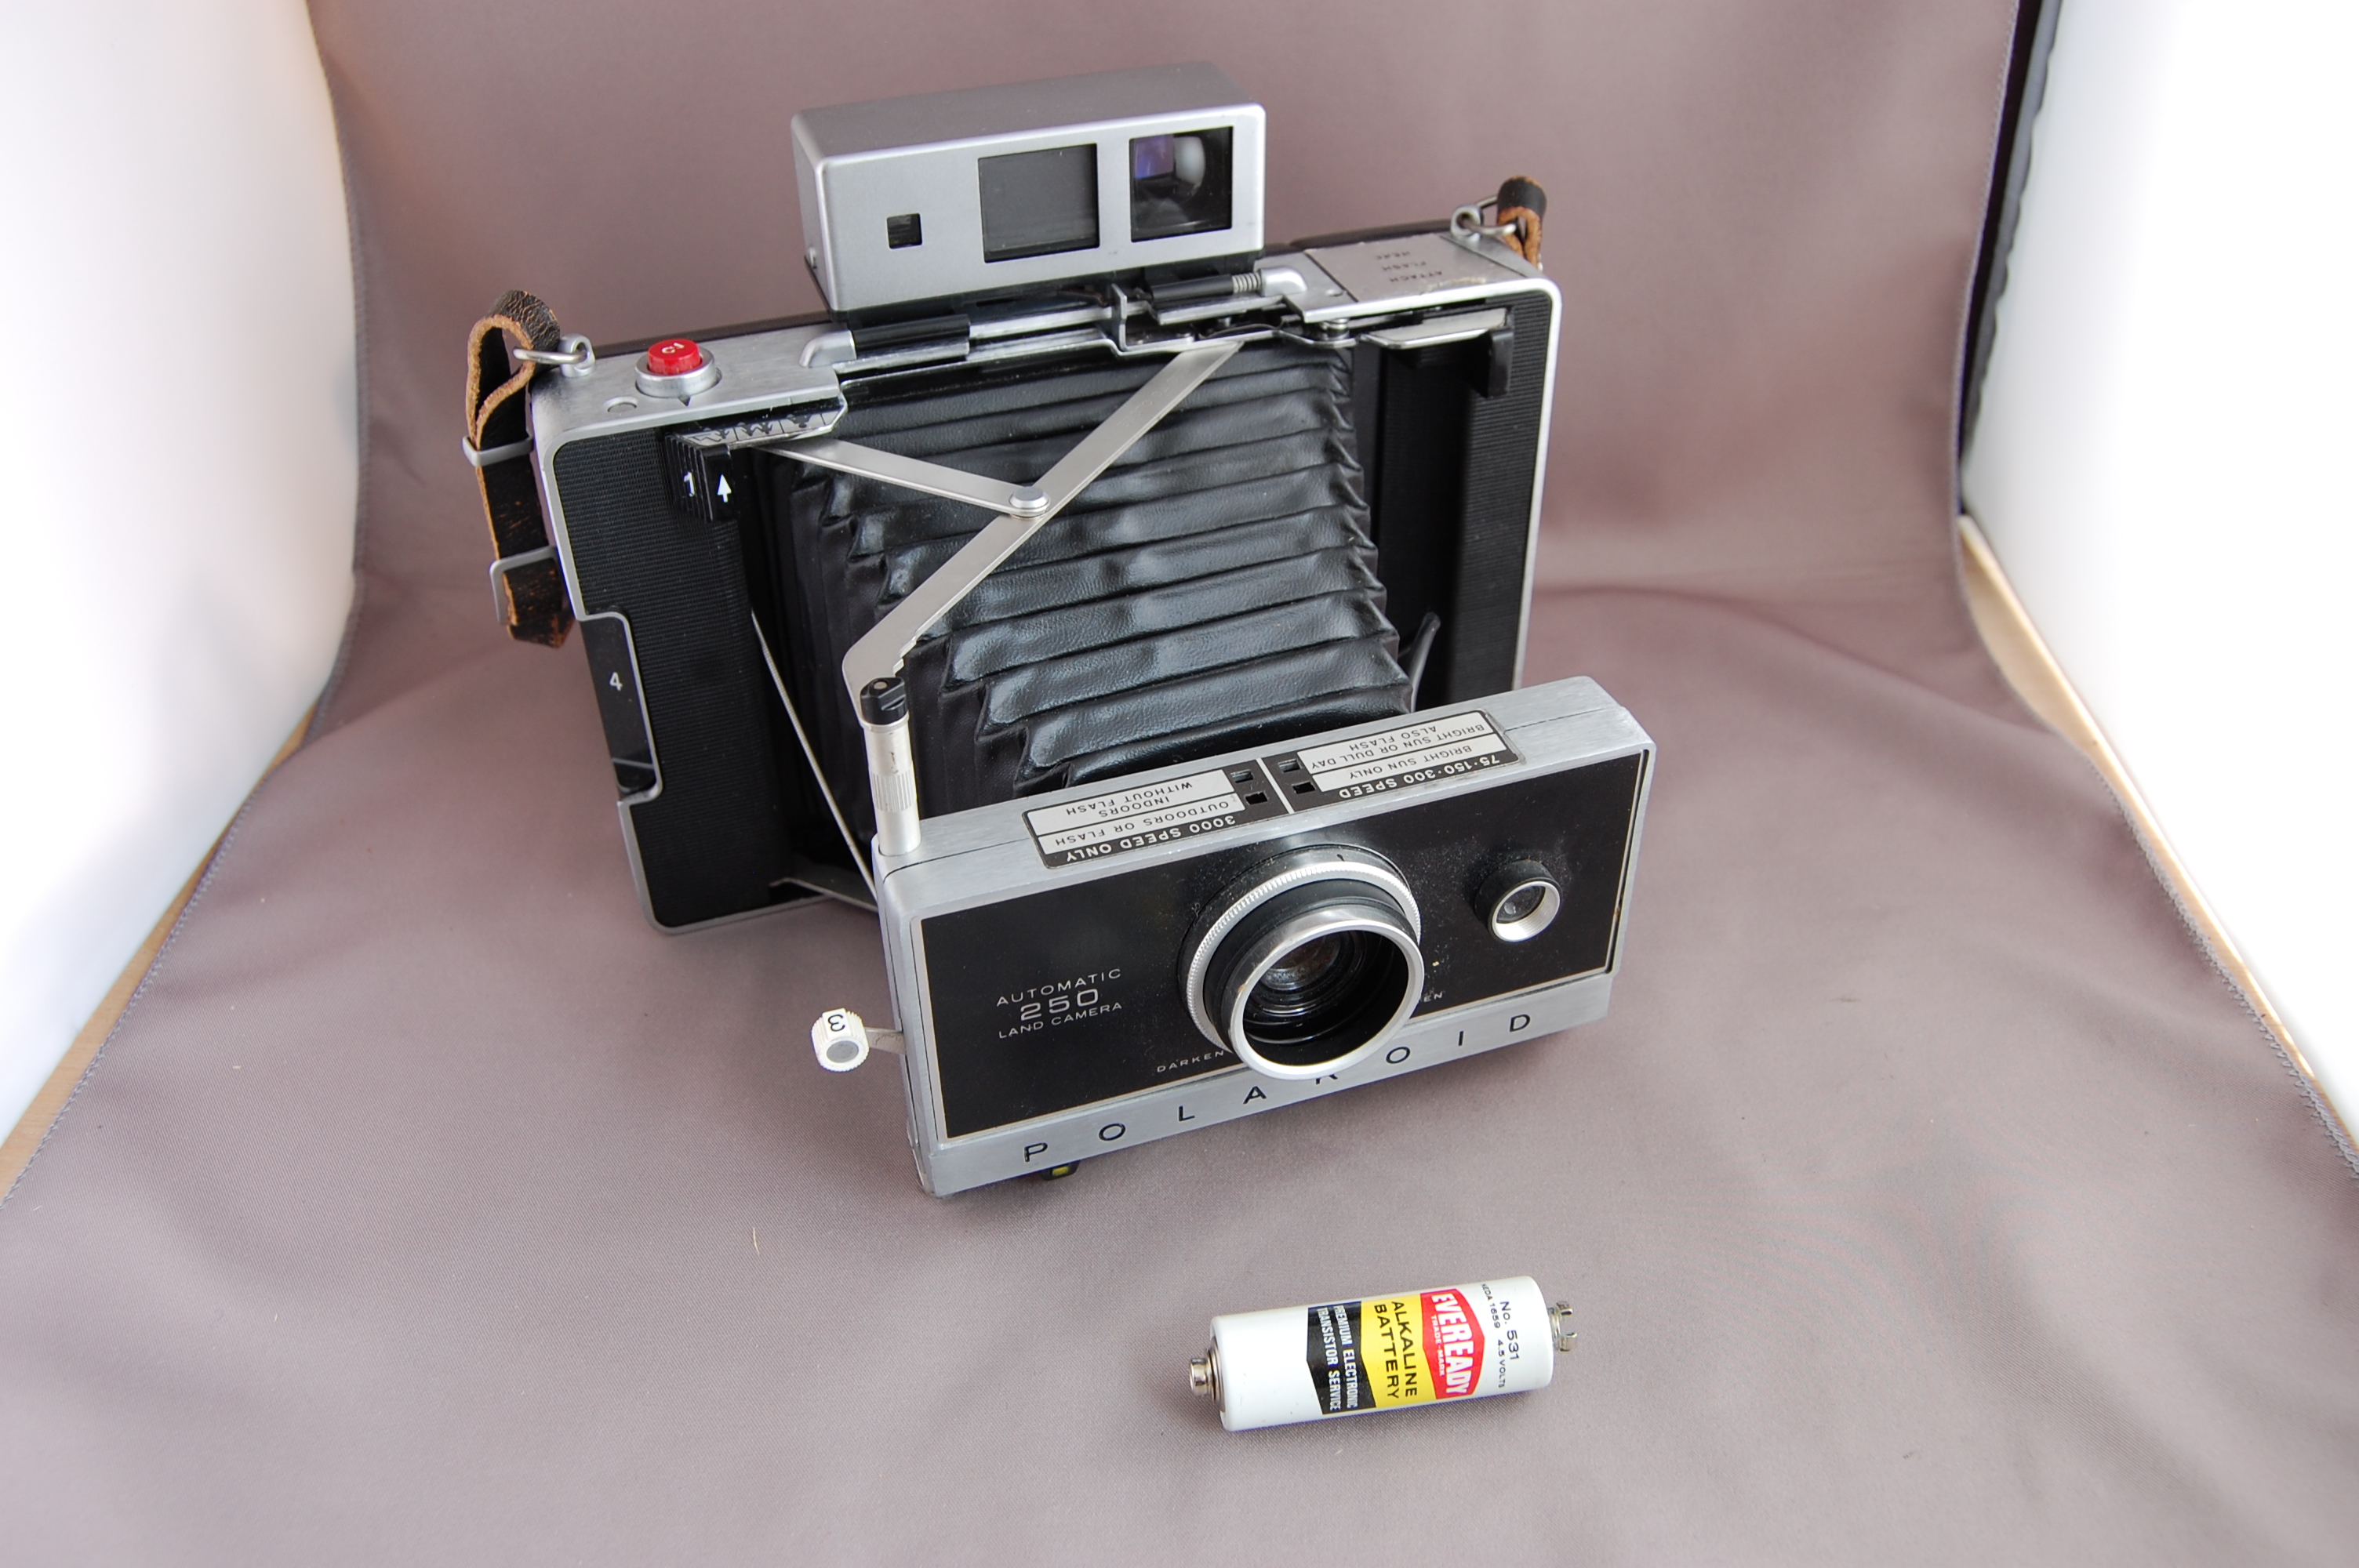
Hey, thanks a lot for that post. One question: can you tell me, wich model ist that one on the first picture? It looks like it has a metal-body and not that plastic. What do you mean?
Thanks & greetings
Hello! Thanks for the tutorial! Am wondering if you have the tutorial for the Conversion of the 4 cell battery holder to 3 cell? Thanks in advance!
The CR123A conversion in the models designed for the #532 battery is the cleanest and simplest conversion. However: the CR123A has a higher power output (amperage) than the #532, even though it still puts out 3 volts. Does this make a difference to the electric eye in the camera? Is it safe to use the CR123A over an extended period? Please advise.
Excellent job of explaining this installation.
Higher amperage should not cause a problem. As I understand it, the amperage rating indicates what's available. If the device has a lower power draw, it will only draw what's needed. What's important is the voltage rating, as under or over voltage can cause damage.
I had moded my 4 land cameras with the external battery pack, worked GREAT!.
See them here I suggest that if you want to avoid cutting the old battery clip out of the camera and opt to attach the new battery pack externally, get a full enclosure which will ensure that the batteries them self are protected. And be mindful if you are sight seeing in a major city and are walking around with a closed up land camera that has wires and black boxes sticking out of it...people tend to get jumpy as they don't know what the scary grey thing slung around your neck might be, and they also tend to call the cops, and that tends to get out of hand REALLY quickly.
To convert a model 350 that uses 2 batteries. Do you replace both batteries with 2 cr123. Also would like to know more about the 4 dime trick
Thank you
Ralph
hello,
it's possible to stuff in three AAA-battery cells into the battery compartment,
but you have to solder the correct sides together to produce 4.5 volts.
Advantage is that the three AAAs are fitting into the battery compartment
without the need of an external battery pack..
Ive actually found success just taping (with electrical tape really well) 2 AA's end to end then taping the leads at the + and - as well. It fits in the original camera battery holder snugly and removes the need for the external battery enclosure.